Reading this in another language? Use your browser's built-in translate option. Button and field names stay in English on purpose, to match what you see in Keysender.
Connect a custom domain so your Access Page sends codes from your own URL instead of the Keysender default domain. Buyers then see a link on your brand, which builds trust. You add one CNAME record at your domain provider, pointed at the Keysender access host. Keysender allows only one custom domain per account, so choose it carefully.
TL;DR
Already using a custom domain? Update its CNAME to point to maper.keysender.com. Do not leave it pointing at the old maper.keysender.co.uk target.
Make sure you have:
We recommend using a subdomain such as access.yourdomain.com instead of your root domain. This keeps your main website unaffected.
Open Account, then Settings in Keysender, then click the Domain tab.
Click Add Domain.
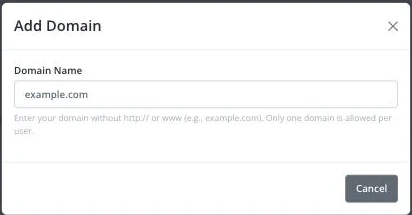
Enter your domain without http:// or www. For example, enter yourdomain.com.
Save the CNAME and SPF values from the popup that follows immediately (see the next section): once the domain is added, the Domain tab's own DNS button shows only its verification status (domain name, Verified/Unverified, added and last-updated dates), not the record values again.
The values in the pop-up are unique to your domain. Copy them exactly as shown, and save them somewhere outside Keysender in case you need them again.
access, not access.yourdomain.com. Most providers append the root domain automatically. @, which represents your root domain. You can only have one SPF record per domain. If you already have an SPF record, add the Keysender include to the existing record instead of creating a new one.
DNS changes can take a few minutes to propagate. Set your TTL to the lowest value your registrar allows, then wait before verifying.
.zip file. .pem before uploading into Keysender. Your Access Page URL shows your custom domain. Orders sent from Keysender use the new domain in delivery emails and access links.
| Symptom | Cause | Action |
|---|---|---|
| The domain shows Expired under Certificate | The uploaded SSL certificate's validity period has passed | Generate a fresh certificate at ZeroSSL, then delete the expired one under Certificate and upload the new files |
| Adding a domain fails | An account can have only one custom domain | Remove the existing domain first if you need to switch to a different one |
| The CNAME or SPF values are needed again | Keysender only shows them once, in the popup right after adding the domain | Re-add the domain to get a fresh popup, or check the values already saved with your domain provider |
Each domain provider has different DNS instructions. Search your registrar help center for how to add CNAME and SPF TXT records. Keysender cannot provide direct support for third-party DNS providers.
If your domain still does not verify after confirming the DNS records are correct, submit a claim so Keysender Support can review it. If you also want your outgoing email to come from your own domain, see Sending email using your custom domain (Gmail SMTP).
Keysender recommends using a subdomain such as access.yourdomain.com instead of your root domain. This keeps your main website unaffected. When you add the CNAME record, set the Host to only the subdomain label, for example access, since most providers append the root domain automatically.
Keysender shows a pop-up with two records unique to your domain. The CNAME record is required and points your domain to the Keysender servers. The SPF TXT record is optional but recommended, and authorizes Keysender to send email from your domain. Copy both exactly as shown.
Update your CNAME to point to maper.keysender.com. Do not leave it pointing at the old maper.keysender.co.uk target. If you already have an SPF record, add the Keysender include to your existing record instead of creating a new one, since you can only have one SPF record per domain.
